之前在调试 ruby 的过程中一直使用的是最简单的 pp 和 puts, 这样的做法有点太原始了,我每次运行一次测试之后都需要再运行一次才能看到结果是否满足预期。为了提高调试效率,开始了解 ruby 的一些 debug 工具。
排除 rubymine 内部集成的 debug tools 外,目前 ruby 较流行的 debug 工具包括 pry, ruby-debugger19, byebug。大致看了一下各个 gem 的 document,感觉 pry 和 ruby-debugger19 的上手难度更小一些。我们先来了解一下 pry。
用 pry 在类之间切换
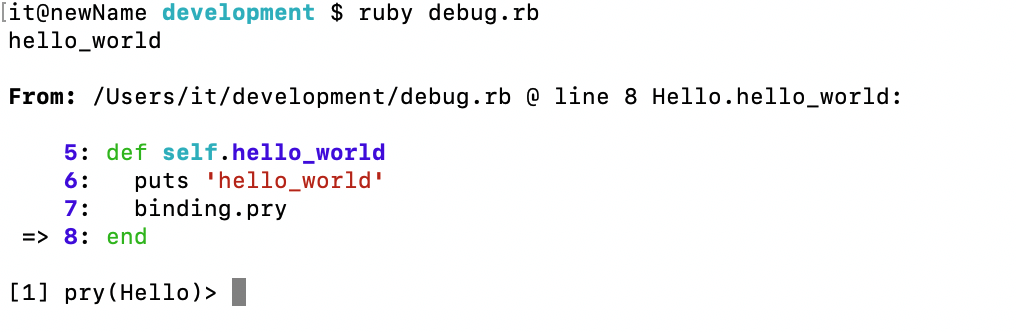
class Hello

  def self.hello_world
    puts 'hello_world'
    x = 10
    binding.pry
  end

end

class Greet

  def self.greet
    puts 'hi'
  end

end

Hello.hello_world
我们在想要调试的代码行加上 binding.pry ,在我们运行该文件时那么程序将会在相应的地方暂停,并且会弹出一个 irb 。
此时我们可以通过 cd 命令在各个类以及变量之间跳转
pry(xxx): 之后的数字代表嵌套的层级,通过 nesting 命令我们可以详细观察。
在循环中使用 pry
class Loop

  def self.iterate(hash)
    hash.each do |key, value|
      binding.pry if value.nil?
      puts "#{key} : #{value}"
    end
  end

end

hash = {name: :lucy, age: nil, address: :new_york}
Loop.iterate(hash)
我们可以在 irb 内使用 show-source 查看源代码。而 step 方法则会进入下一次的 function call,使用 continue 则会一直运行程序直到退出。